This post may contain affiliate links. Please read our disclosure policy.
Pizookie
How to make a restaurant-style chocolate chip pizookie at home. This ooey gooey cookie pizookie recipe will have you begging for seconds!
Today is National Chocolate Chip Day and I couldn’t let this important holiday go by unrecognized! I mean….what gets us through the 3:30 homework rush better than chocolate?
If I could choose my absolute hands-down favorite dessert of all time, this IS it.
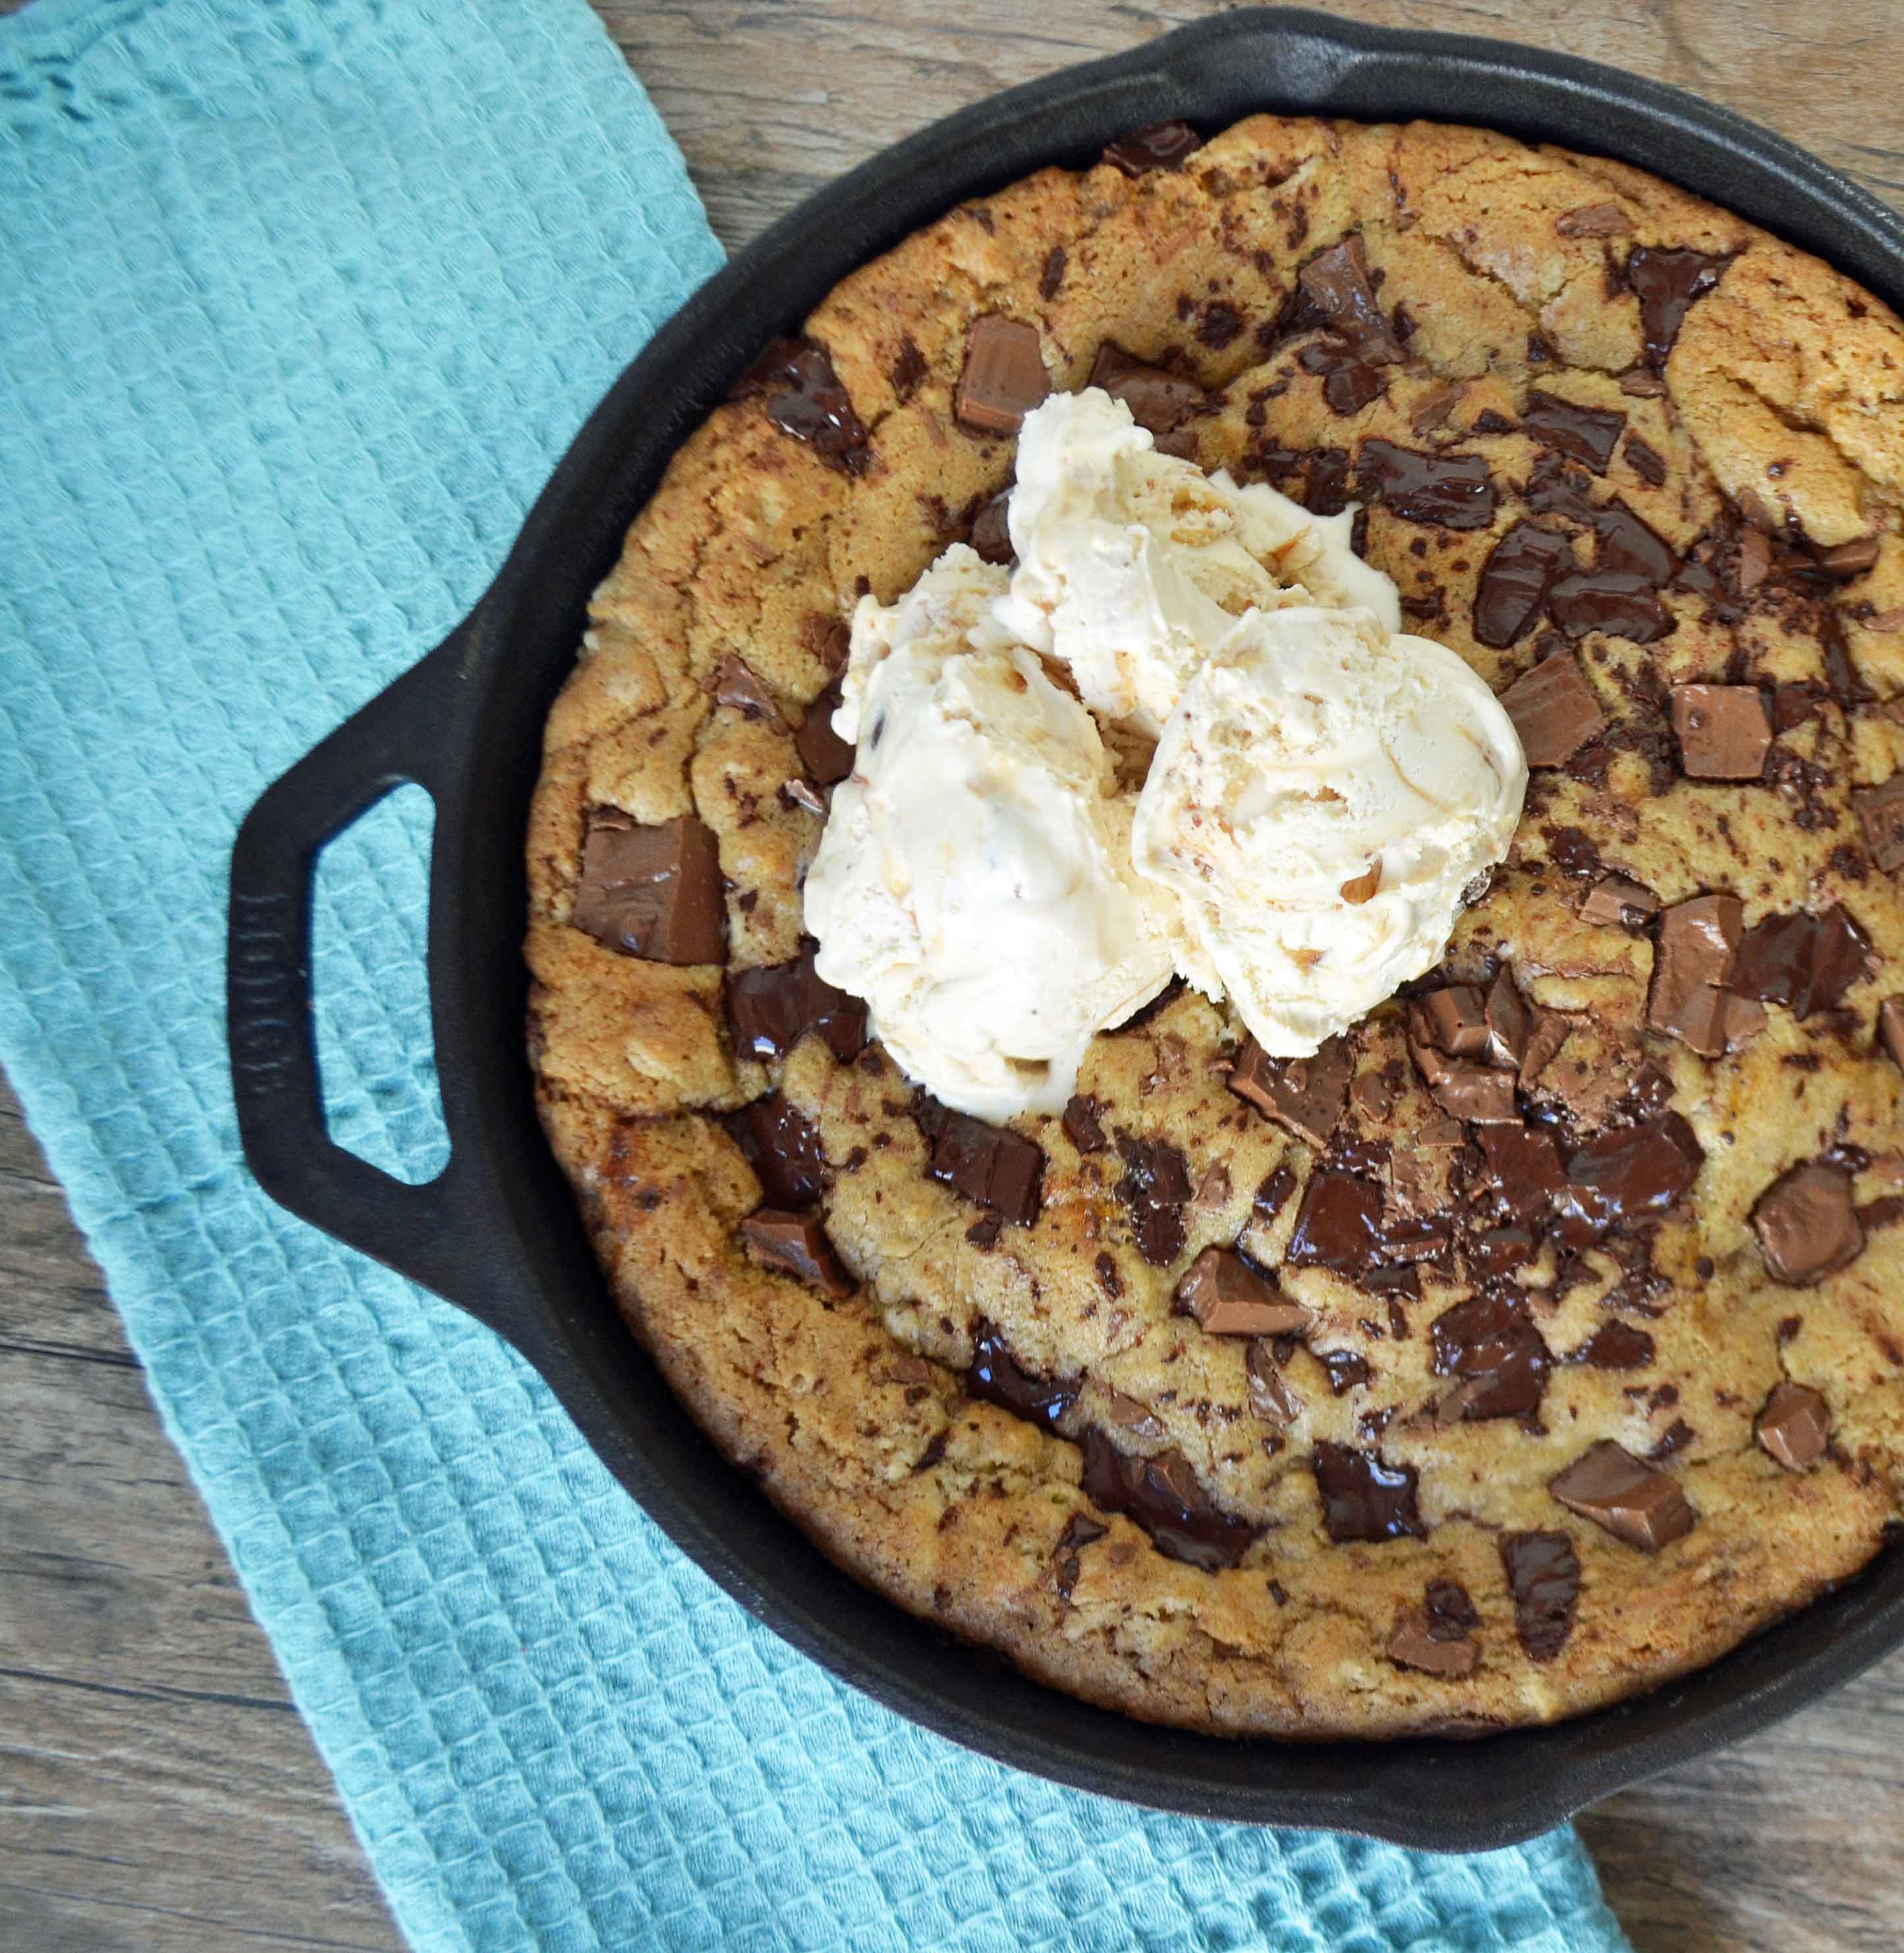
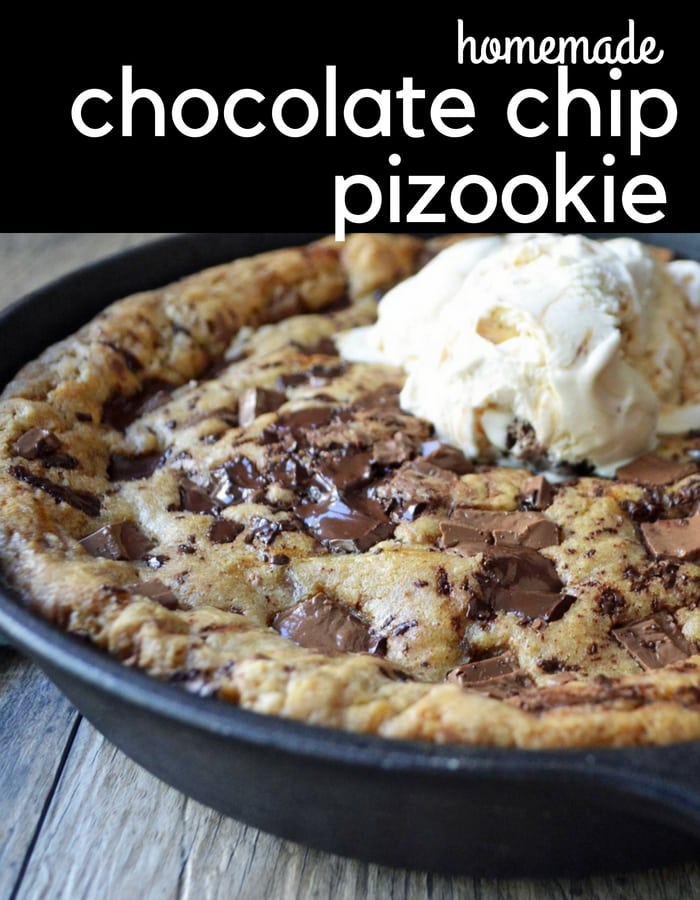
A restaurant here in the Valley of the Sun called Oregano’s is famous for their chocolate chip pizookie. A pizookie or skillet pizza cookie is basically a cookie shaped like a pizza eaten straight out of the oven. Since I can’t go to Oregano’s every time I have a craving for this perfect dessert, I had to figure out how to make it at home. There’s also the famous BJ’s pizookie. This the perfect BJ’s pizookie recipe.
Who else loves the combination of a warm chocolate chip cookie + vanilla ice cream? It’s beyond heavenly. I have tried countless of chocolate chip cookie recipes (trust me on this one) and this one makes the BEST chocolate chip skillet pizookie.
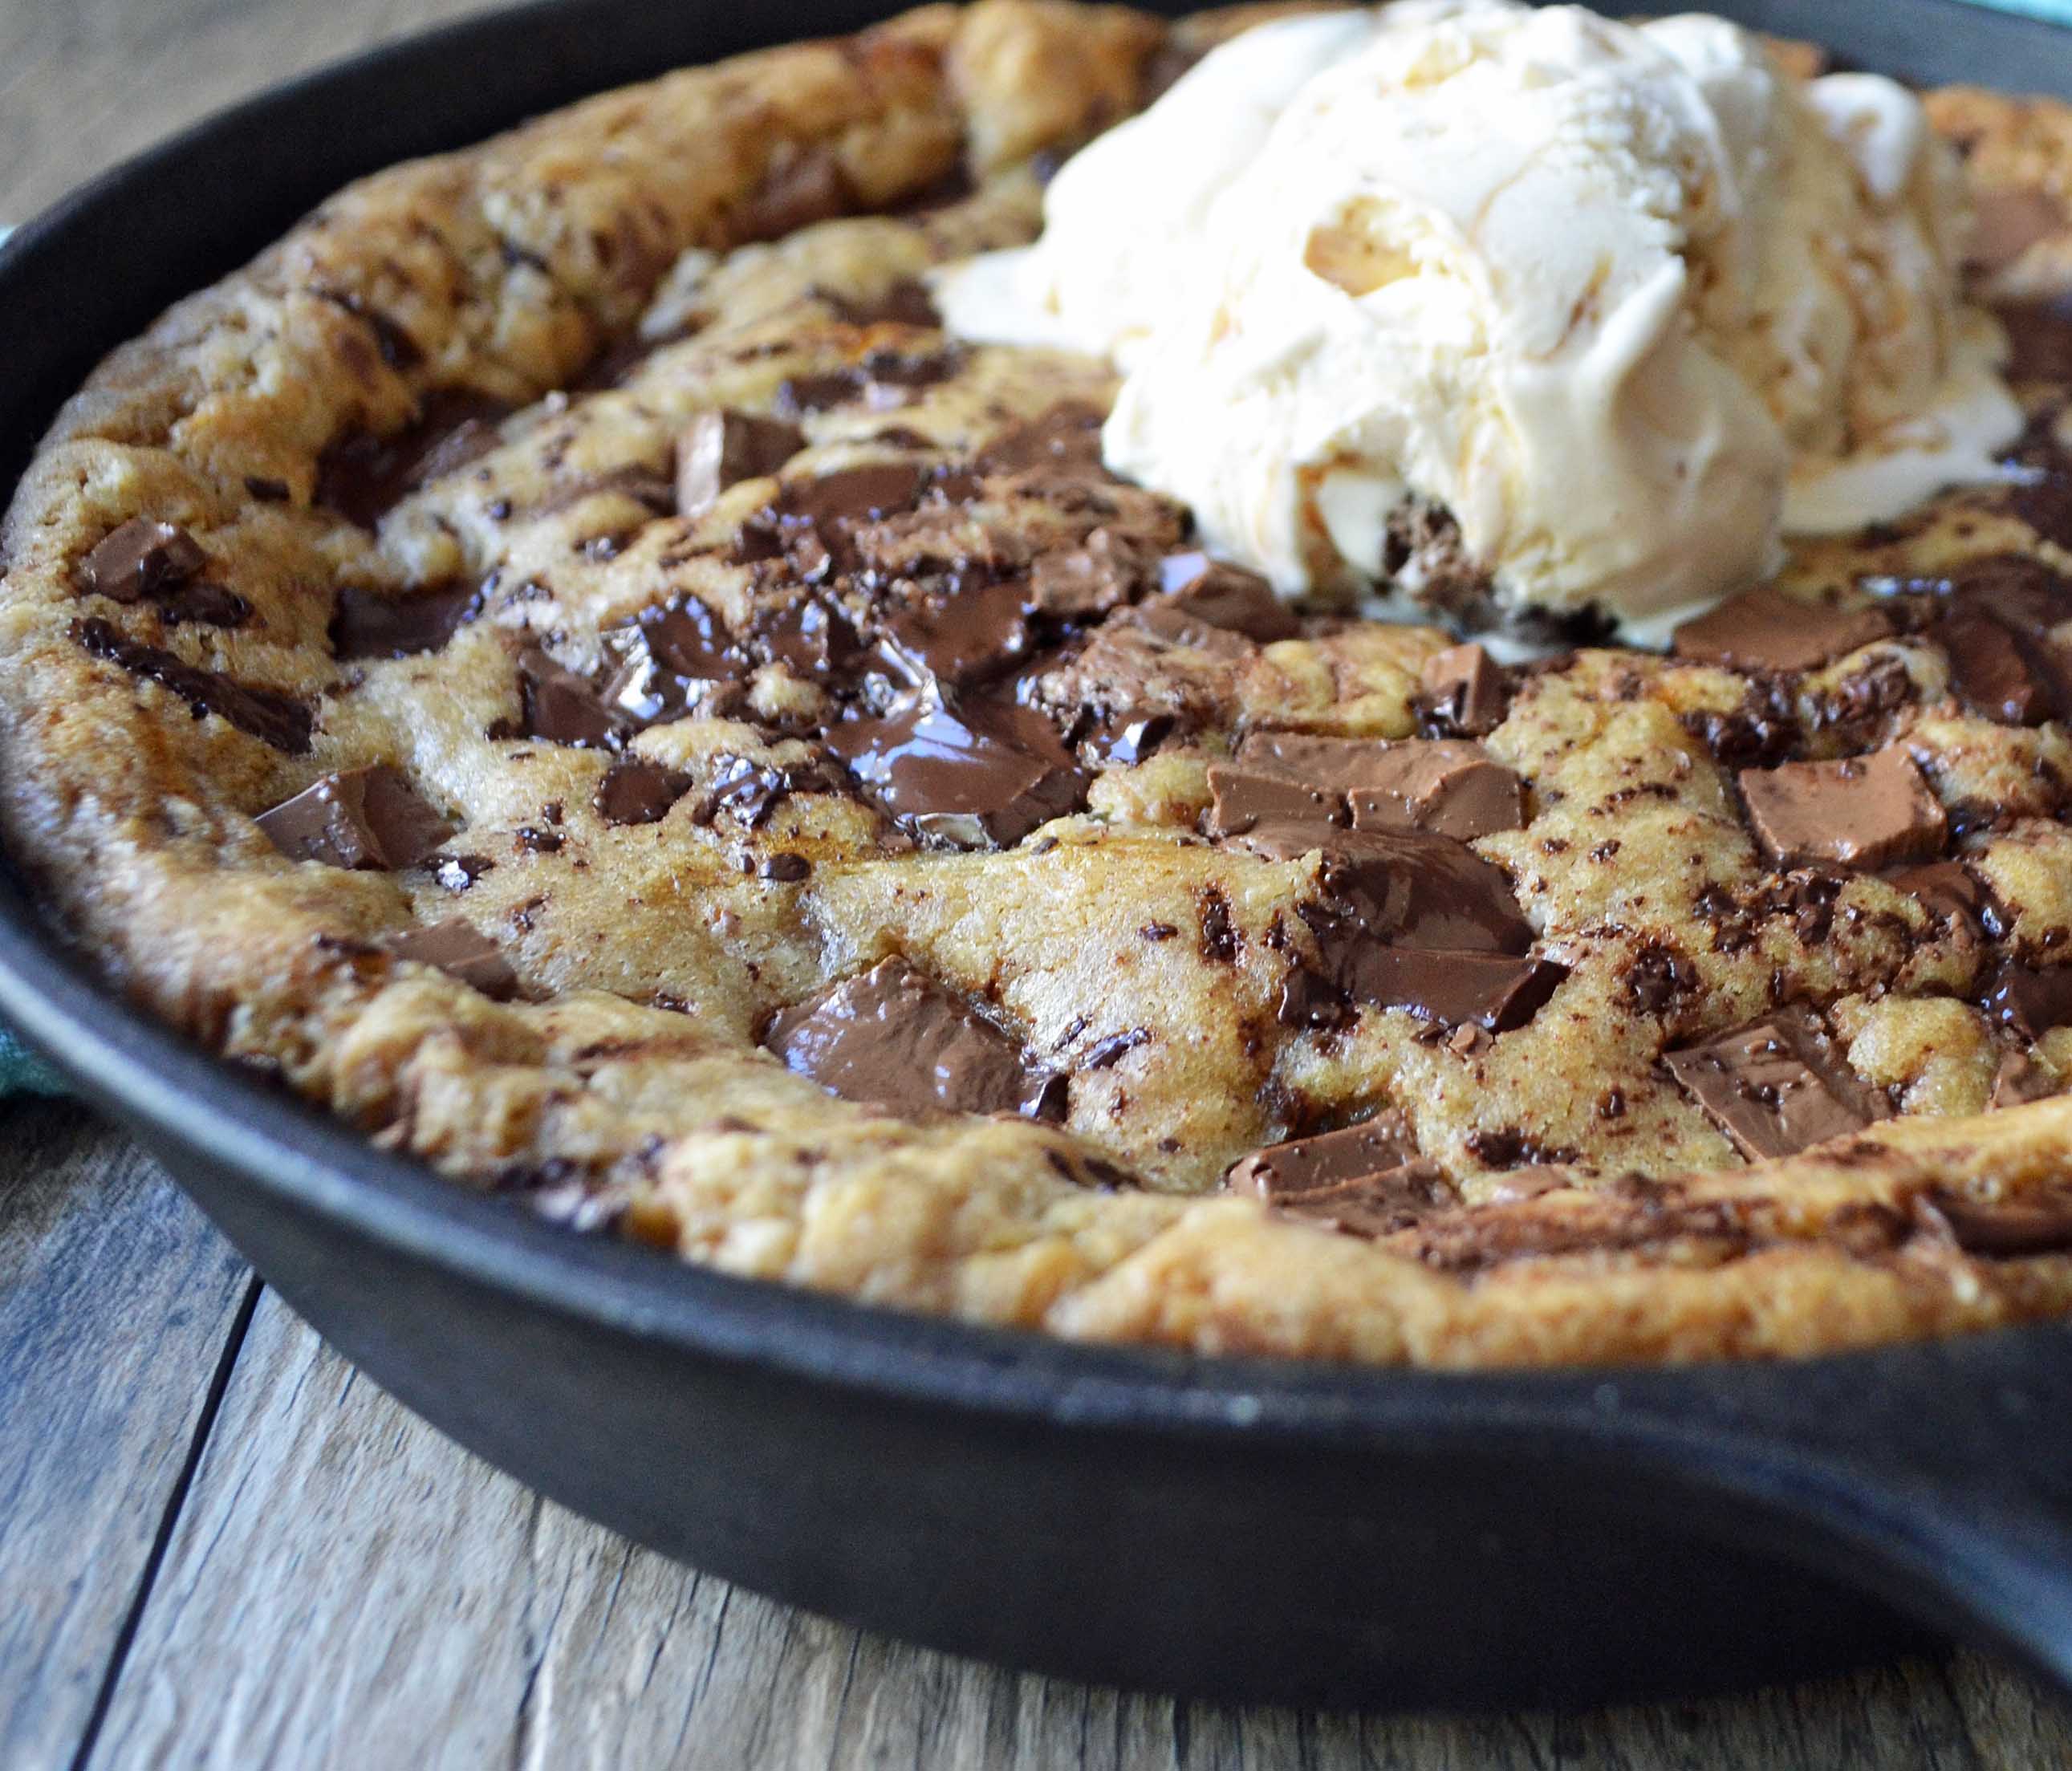
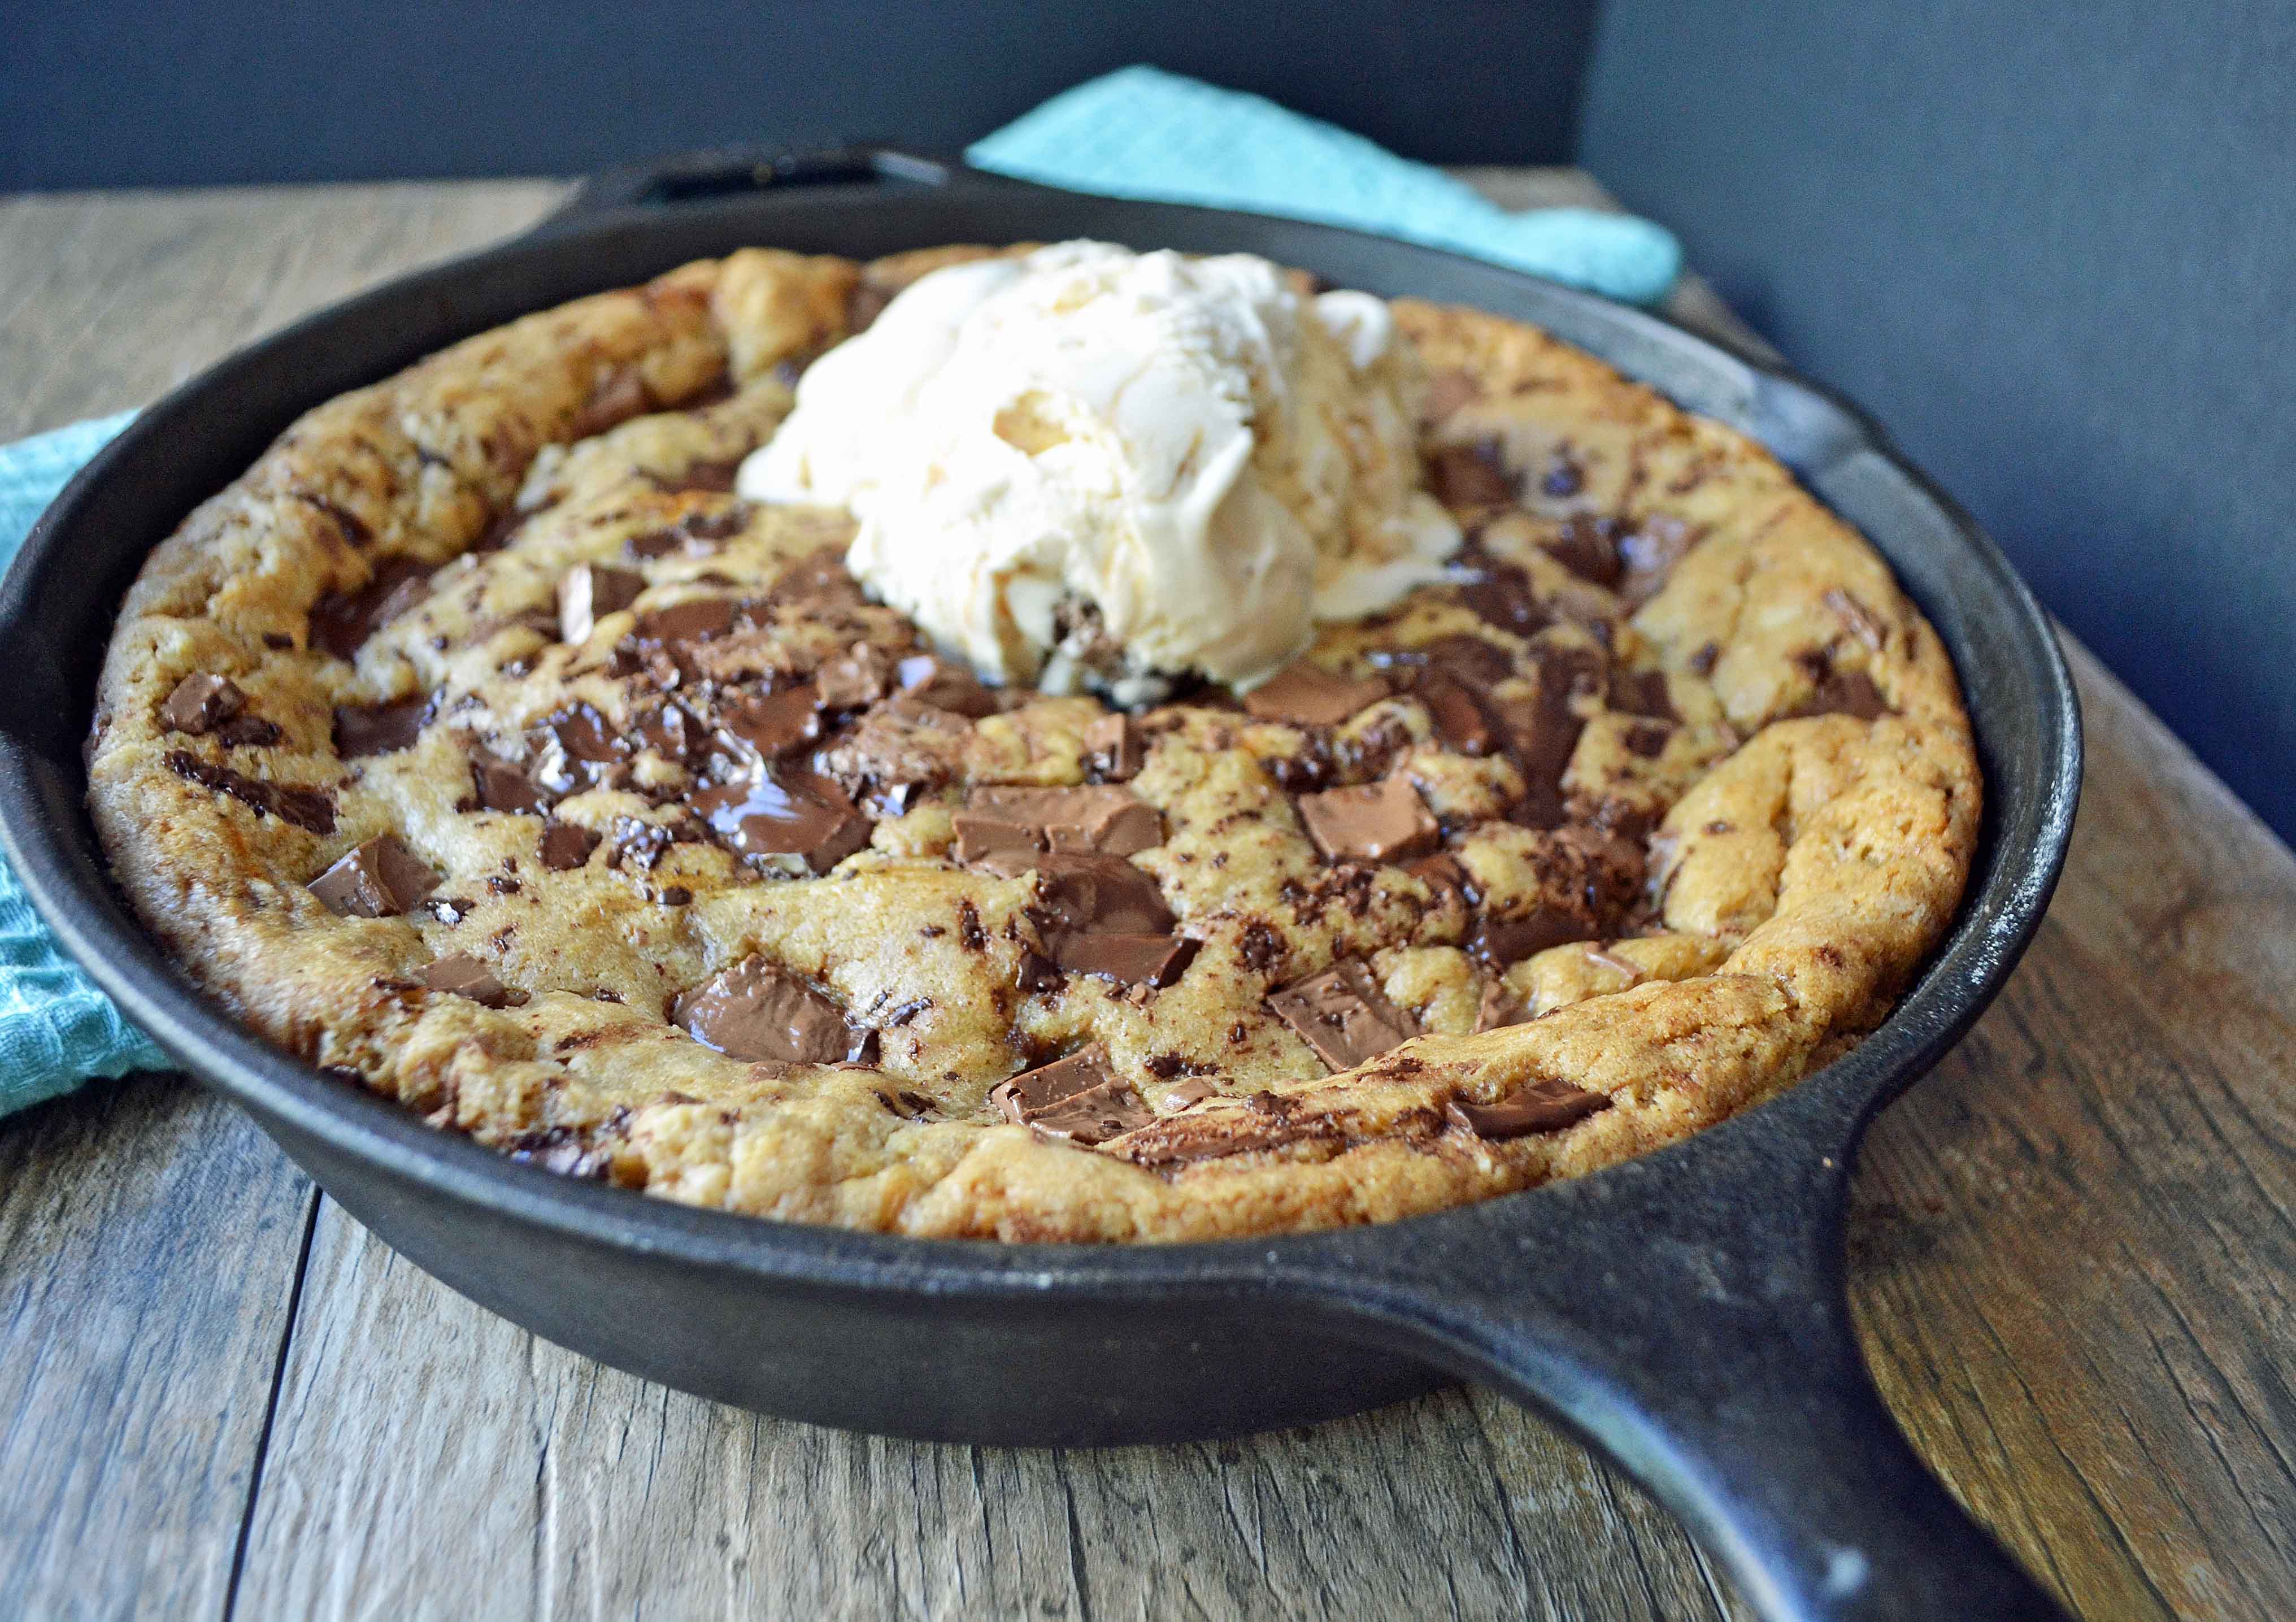
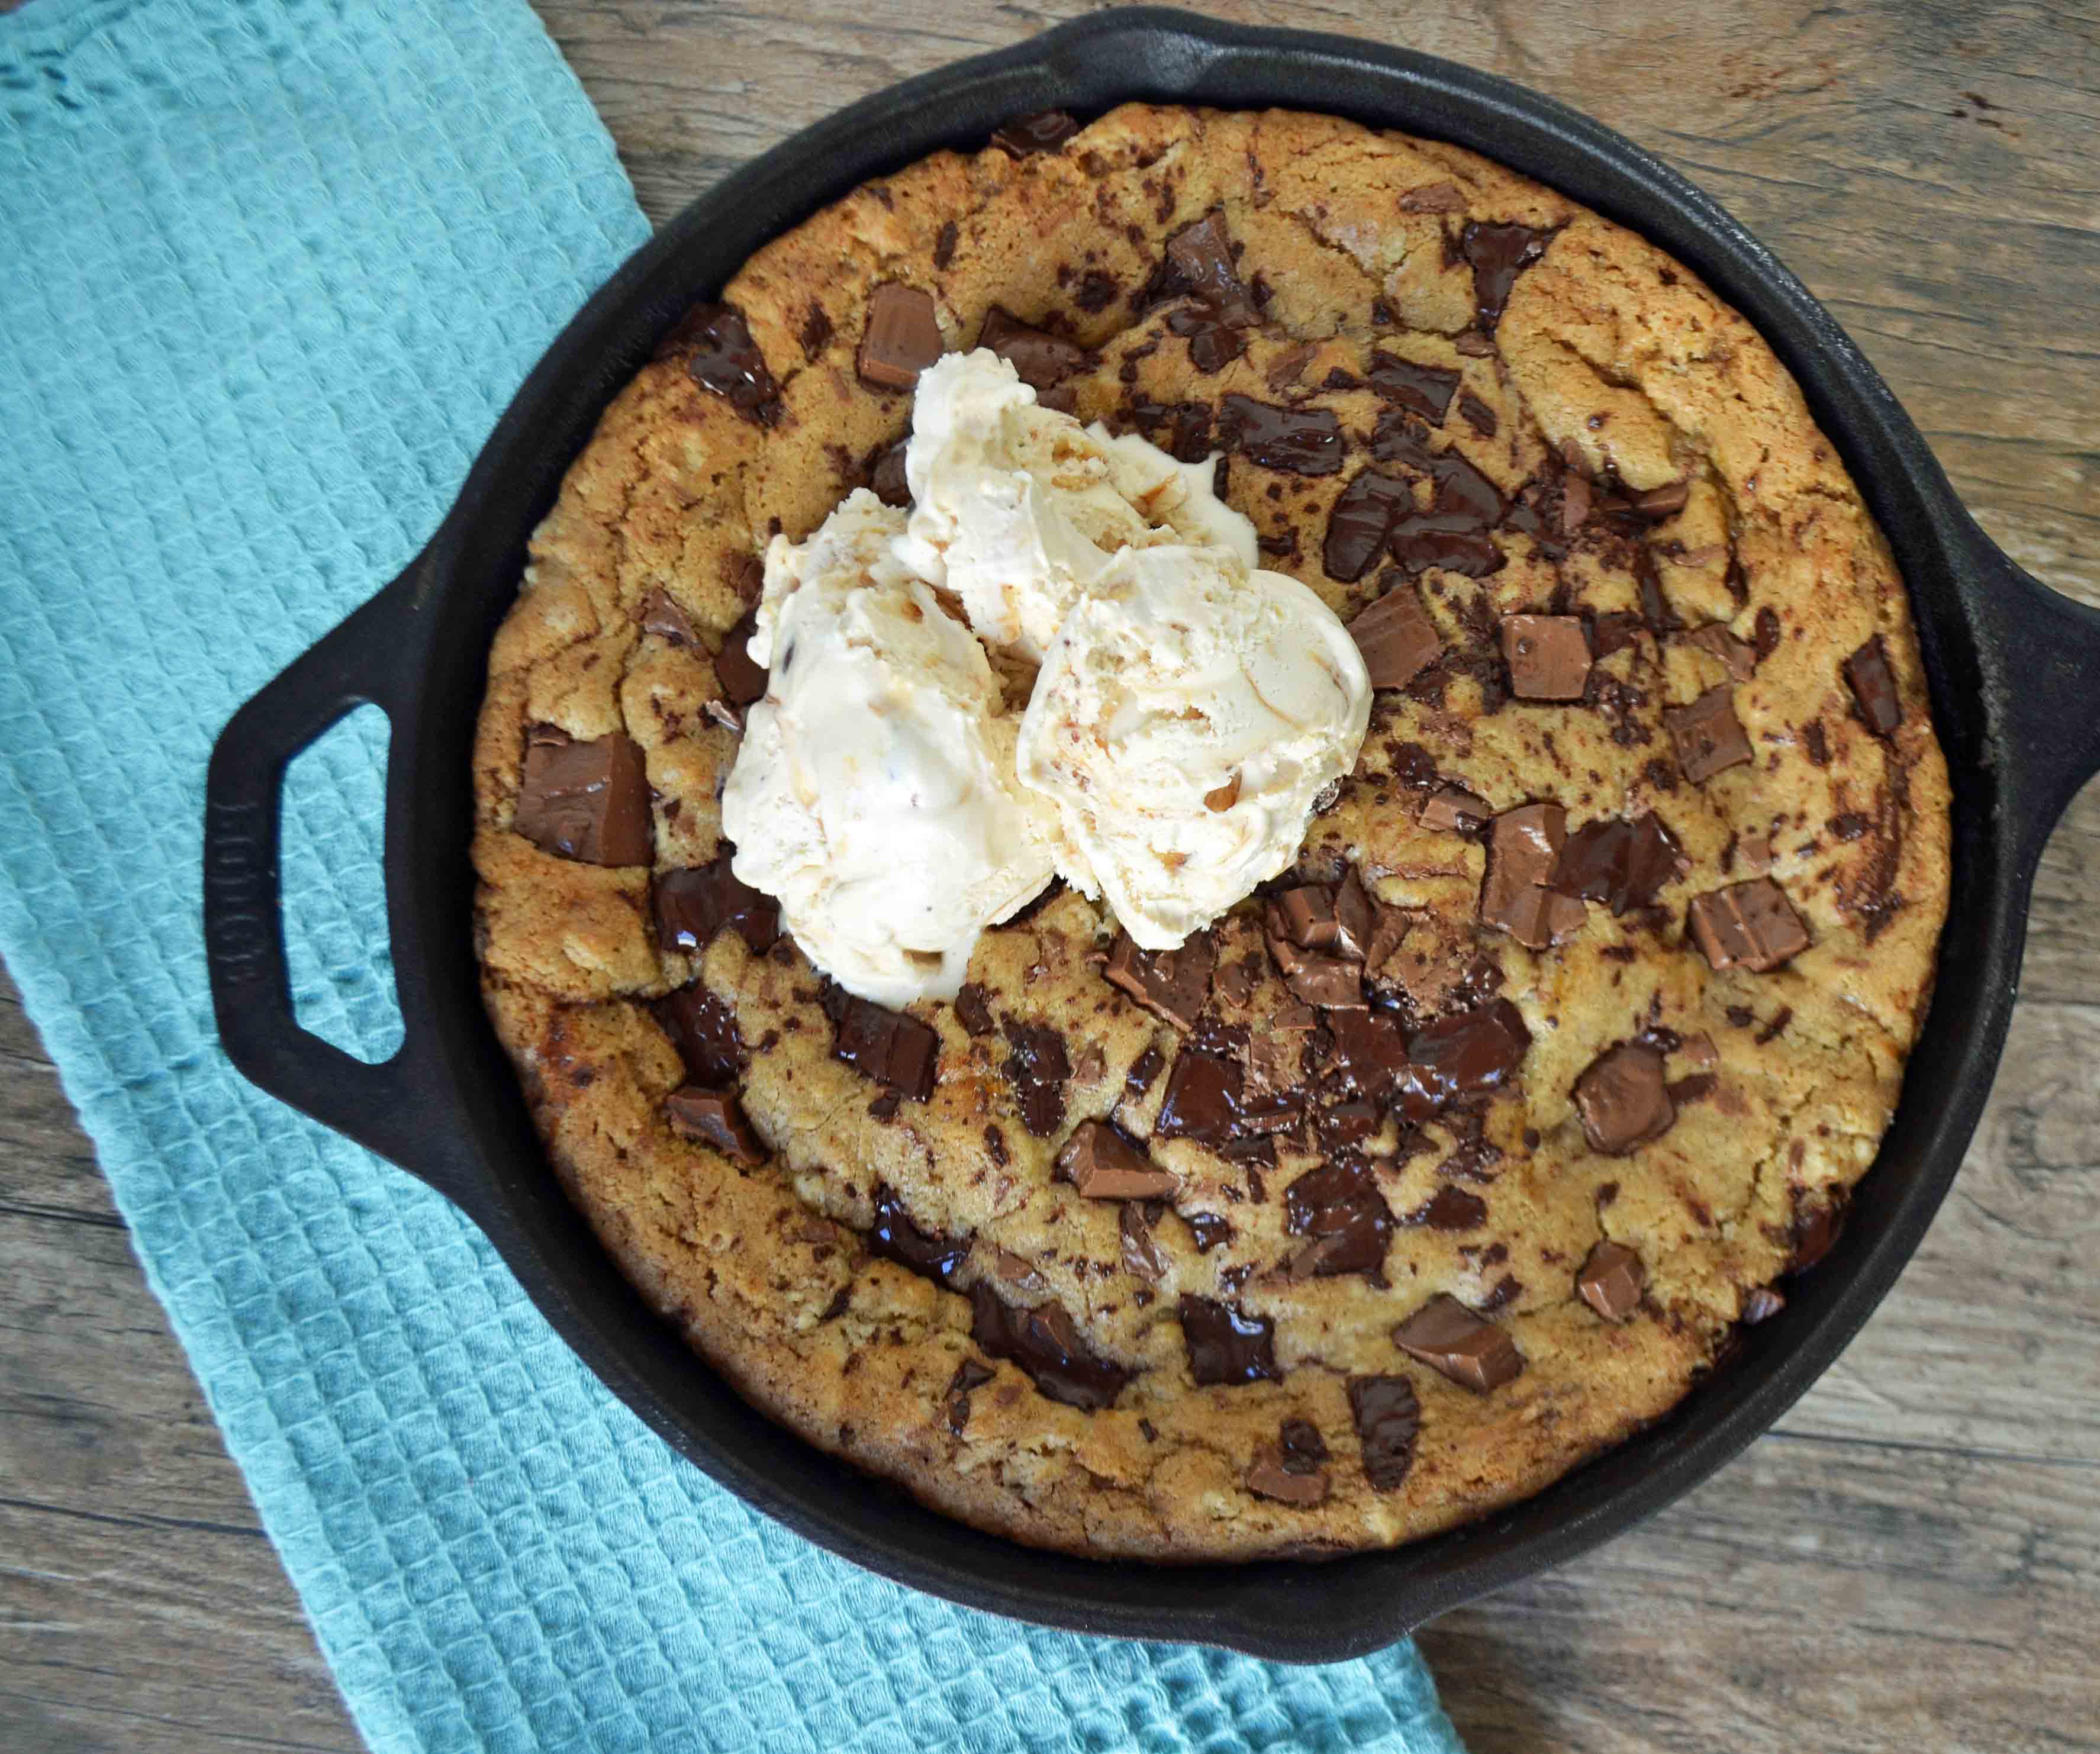
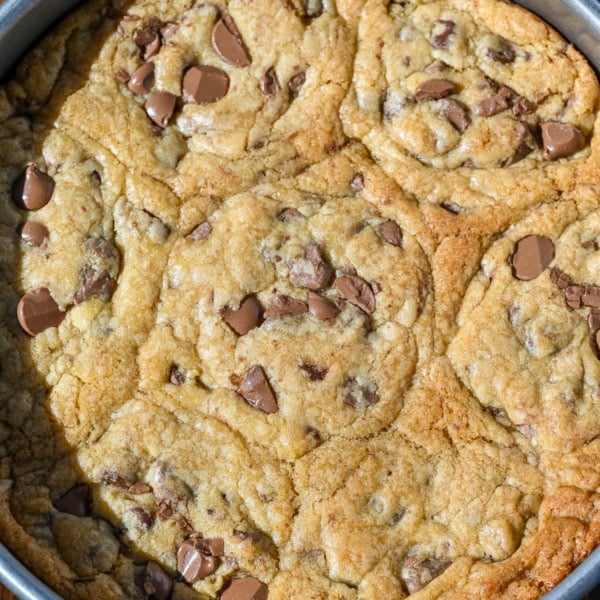
Lady’s Chocolate Chip Skillet Cookie is a warm, ooey, gooey chocolate chip cookie topped with vanilla bean ice cream. It all starts with browning the butter in a cast iron skillet and adding both white and brown sugar, then stirring until nice and smooth. It will look like smooth caramel and smells like homemade toffee.
Let it chill and then add fresh eggs, vanilla, flour, baking soda, salt, and milk chocolate chunks, and semi-sweet chocolate chips. Bake it in the oven and pull it out just a tad bit underbaked and top with vanilla bean ice cream. Have your spoon ready because you will want to dig in while it’s still warm!
How to make a Chocolate Chip Pizookie:
1. A cast iron skillet works brilliantly with this recipe and only costs about $10-$20. If you don’t have a cast iron skillet, you can substitute an oven safe skillet instead. Here are two options for cast iron skillets — and .
2. After the butter is melted, add the sugars and take your time to stir it well to get it nice and smooth. It should have a golden gloss to it and look like melted caramel. to use in this recipe.
3. After adding sugars, chill in refrigerator (place pan on oven mit) for at least 10-15 minutes BEFORE adding eggs. The eggs will scramble if they are added while it’s too hot so get it close to room temperature.
4. Using a mixture of milk and semi-sweet chocolates are a perfect pairing but feel free to use your favorite type of chocolate. White chocolate macadamia is a fantastic option as well.
5. The baking time will depend on the depth of your skillet. If you are using a , it will cook slightly longer than if you are using a 12 inch skillet. You want to watch for the sides to become golden brown and start to get slightly crispy. The center will remain slightly gooey because that’s what makes a chocolate chip skillet cookie pizookie so dang good.
Watch this video to see how EASY it is to make a chocolate chip skillet cookie at home:
It’s makes such an easy cleanup since everything is done in one skillet! A perfect chocolate chip cookie sundae dessert that will make everyone happy and coming back for seconds. Find this skillet cookie recipe below!
Pin this now to find it later
Pin It
Lady's Chocolate Chip Skillet Cookie
Equipment
- 12 inch cast iron skillet
- measuring cups and spoons
- spatula set
Ingredients
- 1 cup Butter
- 1 cup Brown Sugar
- 1/2 cup Sugar
- 2 Eggs
- 1 teaspoon Vanilla
- 2 cups + 2 Tablespoons Flour
- 1 teaspoon Baking Soda
- 1/2 teaspoon Salt
- 3/4 cup Milk Chocolate Chunks
- 3/4 cup Semi-sweet Chocolate Chips
- Vanilla Bean Ice Cream
Instructions
- Preheat oven to 325 degrees.
- In a 10 or 12 inch cast iron skillet, melt butter over medium heat stirring often, until it starts to bubble and is completely melted. Turn heat to low and add sugar and brown sugar, stirring well. Keep stirring until smooth and glossy.
- Chill for 10-15 minutes (you don't want to add the eggs now or you will have scrambled eggs).
- Remove from refrigerator or freezer and add eggs and vanilla and stir well.
- Stir in flour, baking soda, and salt.
- Mix in chocolate and stir to combine. *check to see if dough is at room temperature before adding chocolate to prevent melting.
- Bake at 325 degrees for 26 - 33 or until the edges are lightly golden brown. *The inside will still be slightly gooey and that's the way it's meant to be. If the edges get too brown, Place some foil over edges. The smaller the pan, the thicker the dough which means a longer cooking time.
- Top with vanilla bean ice cream and eat warm.
Video
Nutrition information is automatically calculated, so should only be used as an approximation.
If you would like to see a short 1 minute video demonstration of this Lady’s Chocolate Chip Skillet Cookie (because I am a huge visual learner!), CLICK on this link for a 1 minute video and don’t be shy to share the LOVE on Facebook. 🙂
Thank you so much for your support and love! xo
Happy Baking!

This came out wonderfully, I added a photo to the pin page.
I made this last night and it was so amazing!! Thanks so much for such a wonderful recipe. I think it would be ok but I wanted to see – have you ever made earlier in day and let the dough sit in the fridge to cook when ready? Thinking it would be good for when I have guests over.
Omg, this was amazing!! I just got cast iron skillets for the 1st time and my son was begging me to make a deep dish coookie. We added a 1/4 bag of toffee bits which gave it an even better flavor (if you like toffee!) Thanks for the recipe – it will be a staple in our house! That and the Chicago deep dish pizza in a cast iron skillet recipe I found!!
Hi Karen! Thanks so much for trying out my recipe and I am so happy that you loved it. Such a great idea to add toffee. I am going to try it next time! I think Chicago deep dish pizza and a chocolate chip skillet cookie sounds like the perfect combo. 🙂 – Melissa
I just cut this recipe in half and used whole wheat flour in an 8inch skillet. It’s snowing here today (Denver) and I wanted something warm and gooey to take my mind off the fact that it is snowing in mid-May! This is perfect! I especially love that it can be made and mixed in the skillet! My 8 month old is napping and I plan to eat this for lunch ???? thanks for a great recipe! I will share a photo on Instagram ????
Hi Kerry! Snowing in May? Oh my heavens, that had to surprise you! I would want to eat an entire pizookie myself. 🙂 I am so glad that you loved it and thank you for sharing. -Melissa
I made this recipe exactly as per instructions and paid close attention to the added tips for best results. Once I refrigerated my melted butter and sugar to allow it to cool (for 15 min), it became quite hard and almost toffee-like. When I added the eggs, it was basically like mixing two eggs with chunks of crystallized sugar. I tempered the mixture and reheated gently to melt the sugar back down. The final result turned out fine, but not what I was expecting and not like the photos. Carefully remelting the chunks added a lot of time. Is it possible that I spent too much time allowing the sugar and butter to melt together? I was very careful with measurements so I know that was not the error.
Hi Christine! Thank you for taking the time to comment. I love to study and figure out the science behind baking and what things work and what things don’t work. Here’s what I have discovered about sugar — it can be finicky with heat. It can be quite temperamental and change from silky smooth to a crystalized mess. It sounds as if it was cooked to long and the sugar became hard. Once it is transformed, it is is difficult to bring it back to nice and smooth. I am so sorry that happened! If you try it again, cook it just long enough for it to melt and look like a deep caramel color. Thanks for your feedback and have a great day! – Melissa 🙂
in some recipes the type of white sugar makes a difference. Unless the container says “pure cane sugar” you are probably buying beet sugar which store brands often are. For instance, you cannot caramelize beet sugar as I found out the hard way years ago. This is just a suggestion of what may have happened if you did not have pure cane sugar.
Hi, I’m going to try and bake this tomorrow for a birthday but all I have is an 8 inch cast iron skillet and I’m trying to figure out how to make sure I’ll be putting the right amount of each ingredient. Are you able to help me out on this?
Hi Jennifer! Great question! I would suggest cutting the recipe in half. This way the dough will still come up about half way up the pan. I would take a few minutes off of the time since it won’t need to cook as long. I hope this helps! Let me know how it turns out. 🙂
Hi I was wondering if I could substitute the chocolate chunks for more chocolate chips and if so how much more chocolate chips should I add?
I’d love to know the answer to this as well… I only have milk chocolate chips…
Hi Andrea! You can absolutely use milk chocolate chips! You can use the same amount of chips as chunks. It will be delicious! – Melissa 🙂
Hi isabel! I apologize in the delay in replying to your comment. I have been experiencing issues with my comment box and it is finally fixed. Yay! You absolutely can substitute chocolate chips for chocolate chunks and it would be the same ratio. Hope that helps! – Melissa 🙂
I made this recipe exactly as written and shown in the video, however my batter was significantly more runny than the video. I added a half a cup more flour and it was still not cookie dough consistency. I trusted that if I baked it according to the recipe though that it would turn out. I was wrong. The outside of the cookie baked beautifully, while the inside was a goopy mess of melted chocolate and runny cookie batter. This was after baking it 10 mins longer than the recipe called for. I don’t understand why mine turned out so awful, but I will definitely not be making this again. We ended up tossing a whole skillet of wasted ingredients away on thanksgiving.
Hi Kat! Well, that’s a huge bummer! I am sorry that it didn’t work out for you. It is a recipe that I have made hundreds of times and it should be shiny but definitely not runny. I am wondering if the liquid to dry ingredients ratio was off in your recipe as you shouldn’t have to add any more flour. Plus if you had to cook it for 10 minutes longer and it still didn’t set up tells me that the ingredients were off.
I had the exact same problem. I followed the recipe exactly; are you baking at altitude or something? I have NEVER had a problem with cookie dough before, but this recipe didn’t work for me.
Hi, all! I made the recipe as directed (no missing or mismeasured ingredients), and I also got a gooey mess! I added 10 minutes to the baking time and even a few extra degrees in the oven. The edges cooked, but the center didn’t set. If anyone else has thoughts on what might have happened, let me know! I can’t seem to rate this with the stars correctly, but I’m leaving a comment to flag this as a possible issue for future bakers.
Same problem for me. Followed the directions exactly. The dough was super runny and after baking for over 33 minutes the center still appeared raw. Maybe it’s an elevation difference?
Same thing happened to me. Followed as written exactly. Came to the comments to see if anyone else had the same problem. Total bummer.
Hi! I made this last night and it was amazing! Is there a way I can pre make it for an event for tomorrow night!??
Hi Jennifer! Sorry for taking so long to reply to your question. You can definitely pre-make your dough and let it chill overnight (or even up to 48 hours). Cookie dough gets better with time and I suggest chilling it for 24-48 hours. Let me know how it turned out! Thanks so much! – Melissa 🙂
If you preamble the batter on the cast iron do you leave it in there and refrigerate or remove and add back to cast iron when ready to bake
I just cooked this and like the other poster didn’t have chocolate chunks so I added M&M’s and walnuts, but my question is what is the best way to store it? Do you leave it out or put in the fridge? Yes I have leftovers hard to imagine LOL!
Hi Jennifer! Oh that sounds heavenly! I love the addition of M & M’s and I may just try that today. Thank you for taking the time to share your suggestion. I would cover it tightly and store it either at room temperature (if you are going to eat it that day) or even freeze it. Have a great day! – Melissa